REVIEW · BARCELONA
Experience in Leather Goods Workshop- Leather Accessory
Book on GetYourGuide →Operated by SEE YOU LEATHER · Bookable on GetYourGuide
Leather is one of the fastest ways to feel creative. This workshop in Catalonia lets you pick your project and work step-by-step, using real leatherworking tools and vegetable-tanned leather from the start. I like that the instruction stays practical and beginner-accurate, so you are not just watching.
Two things I really appreciate: the patient, clear coaching (it’s explained at eye level and paced for first-timers), and the fact that you leave with a usable item you made yourself. The only possible drawback is time: it’s a 2-hour class, so you’ll need to focus on finishing what you start rather than expecting a complex, super-custom build.
In This Review
- Leatherworking in Catalonia: What You’re Really Doing
- Key Takeaways Before You Go
- Finding Your Way to See You Leather
- The 2-Hour Flow: From Paper Pattern to Leather Finish
- 1) Choose Your Leather Accessory Model
- 2) Pattern Work on Paper (Where Beginners Get Confidence)
- 3) Move to Leather: Cutting and Basic Manipulation
- 4) Tool Time: Dies, Riveters, Hammers, Burnishing
- 5) Finishing Touches: Findings, Assembly, and Optional Dye
- 6) Initials Engraving: Make It Yours
- Price and Value: What $82 Buys You
- Who This Workshop Is For (And Who Should Skip It)
- What You’ll Take Home (So You Actually Get Value)
- The Teaching Style That Makes Beginners Feel Safe
- Small Group Size: Why Limit 10 Helps
- Quick Practical Tips Before You Reserve
- Should You Book This Leather Accessory Workshop?
- FAQ
- Where does the workshop meet?
- How long is the leather goods workshop?
- What does it cost?
- How big is the group?
- What languages are used by the instructor?
- What leather accessory projects can I choose?
- Is the leather and pattern included?
- Can I dye the leather in the workshop?
- Is initials engraving included?
- Is there free cancellation?
Leatherworking in Catalonia: What You’re Really Doing
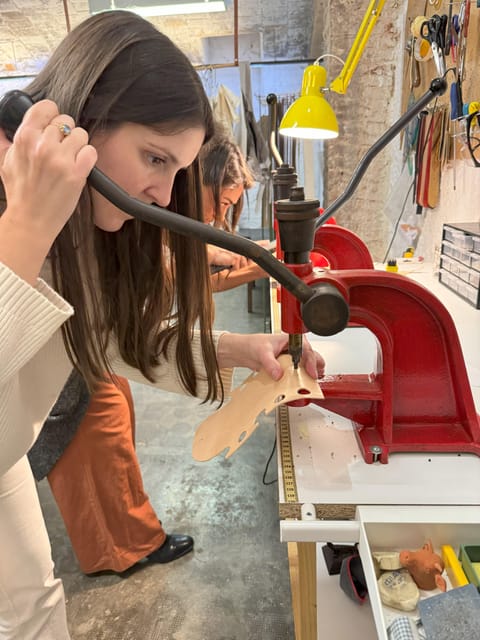
This is a hands-on leather accessory workshop run by SEE YOU LEATHER (meet at the store called See you Leather). You get a small group setting—limited to 10 people—so you’re not lost in a crowd. The whole experience is built around one clear goal: choose an accessory, make it from scratch, and take it home.
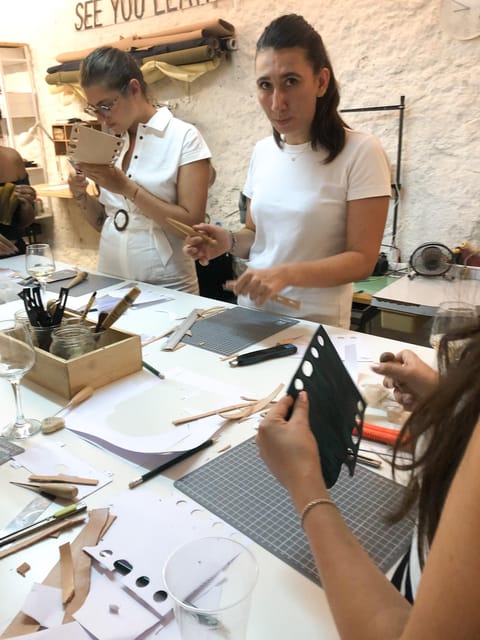
You’ll move through a learning arc that makes sense. First you work with paper to understand shape and layout. Then you work with leather to cut, shape, and assemble. Along the way, you’ll handle tools people actually use in leathercraft—dies, riveters, hammers, cutters, burnishers, and more.
Key Takeaways Before You Go
- Pick your accessory upfront: glasses case, jewelry tray, cardholder, or wallet
- You start with the pattern, not guesswork: paper practice before leather cutting
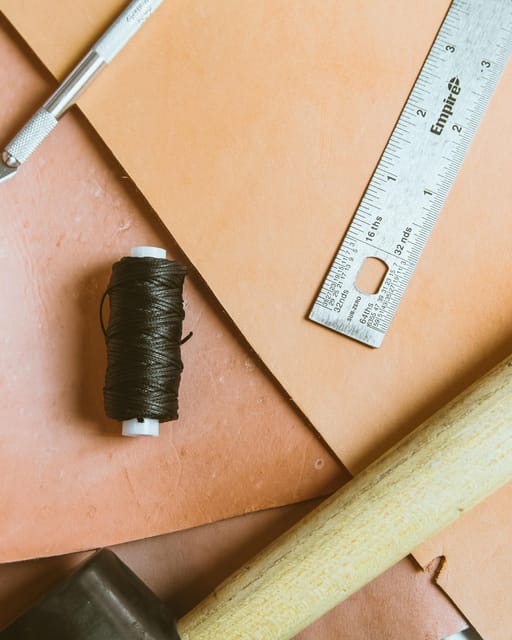
- Tools are part of the lesson: dies, riveters, hammers, cutters, burnishers
- Personalization is built in: optional dye plus included initials engraving
- Small group format: max 10 participants for real help
You can also read our reviews of more tours and experiences in Barcelona.



Finding Your Way to See You Leather
The meeting point is the store See you Leather, run by SEE YOU LEATHER. That matters more than you might think. A store-based workshop often means you’re surrounded by the materials and tools for the job, not shuttled to a classroom-like space with the same generic kit.
Also, you’re in Catalonia, Spain. The experience language mix is Spanish and English, so you can usually track instruction without guessing. If you’re the type who likes to follow directions carefully (and you want your edges to look right), this language setup is a comfort.
Plan to arrive a few minutes early if you can. Even with the best-run classes, shoe-on-time helps your pattern work start smoothly.
The 2-Hour Flow: From Paper Pattern to Leather Finish
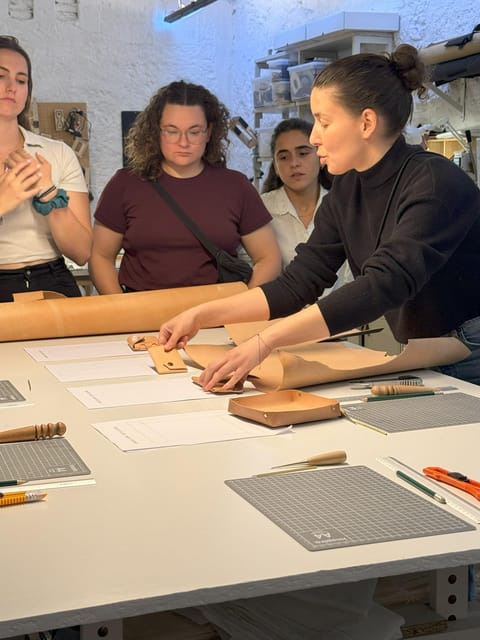
This is a compact workshop, designed to help beginners get results quickly. The duration is 2 hours, so the schedule is purposeful: you will go from concept to completed accessory without getting stuck in one step too long.
Here’s the typical progression you should expect:
1) Choose Your Leather Accessory Model
You can choose from four project options:
- Glasses case
- Jewelry tray
- Cardholder
- Wallet
Picking the model sets the entire rhythm of the class. Different accessories mean different shapes and assembly steps, so your instructor will guide you based on what you selected.
Tip for your decision: choose the item you will actually use at home. A handmade wallet or cardholder is easier to justify carrying daily, while a glasses case can be a great gift.
2) Pattern Work on Paper (Where Beginners Get Confidence)
You receive the pattern for your chosen piece. Before touching the leather, you’ll get a first approach on paper. This is a smart move because paper lets you learn:
- how the pieces connect
- how margins and edges matter
- how cutting lines translate to real-world leather
You’ll cut and manipulate the paper pattern first, so you can get comfortable with tools and layout. For beginners, this is where a lot of the stress disappears. You’re not trying to solve shape and tooling at the same time.






3) Move to Leather: Cutting and Basic Manipulation
Once your paper pattern makes sense, you transfer that knowledge to the leather piece you are provided. A piece of natural vegetable-tanned leather is included, and you’ll work from your pattern to cut it accurately.
You’ll handle cutting tools and learn how to control your pressure and alignment. The goal isn’t just to get through cutting; it’s to create a clean starting point for assembly.
4) Tool Time: Dies, Riveters, Hammers, Burnishing
This workshop is very hands-on with classic leather tools. You’ll work with tools like:
- dies
- riveters
- hammers
- cutters
- burnishers
Even if you’ve never used any of these, the class structure should make them feel learnable. The instructor approach matters here. In particular, multiple participants highlighted the teaching style as patient and clear, with explanations paced for beginners.
When tool time goes well, you stop thinking about leather as something mysterious. It becomes a set of steps you can repeat.
5) Finishing Touches: Findings, Assembly, and Optional Dye
Your reservation includes the piece of leather plus the necessary findings for finishing. That typically means you’re not scrambling to find small metal components or closures to make the accessory complete. It’s one of the biggest reasons this workshop feels good value: you are paying for a full path to a finished product, not a partial demo.
You also get an option to dye the vegetable-tanned leather during the workshop. If you want your finished accessory to feel more personal than natural tan, this is your moment.
Practical note: dye adds decision-making time. If you’re unsure, ask what results look like with that specific leather. With only 2 hours, you’ll want to avoid spending too long second-guessing color.
6) Initials Engraving: Make It Yours
Initials engraving is included. This is a small detail, but it’s one of the most satisfying parts of a leather workshop because it turns a handmade item into something clearly yours.
If you bring initials you actually use (middle name included, nickname spelled right, etc.), you’ll be happier when you unwrap your finished piece.
Price and Value: What $82 Buys You
At $82 per person for a 2-hour small group experience, you’re not just paying for a craft project—you’re paying for:
- instruction and tool guidance
- all materials (leather piece + pattern + finishing findings)
- initials engraving
- time-saving structure (paper pattern to leather workflow)
In other words, you’re paying for the “how,” not just the “stuff.” Many beginner classes fall apart because participants end up needing extra tools or extra materials after the fact. Here, the workshop includes the essentials so you can complete something you can actually use.
If you’re weighing this against doing something similar on your own, the biggest value is that you learn the process in one sitting, with real feedback. And because the group is limited to 10, you’re less likely to get stuck waiting for help.
Who This Workshop Is For (And Who Should Skip It)
This is a strong fit if you:
- want a beginner-friendly introduction to leatherworking
- like making practical items, not just souvenirs
- want a small group class where instruction can stay personal
- enjoy personalization like initials and optional dye
It’s also a good choice if you’re traveling with limited time. Two hours goes by fast when you’re cutting, shaping, and assembling something tangible.
You might think twice if you:
- expect a long, slow craft session with deep advanced techniques
- want a fully custom design from scratch with no pattern provided
- have a very strict schedule and can’t handle a workshop pace (classes move step-by-step and will keep you on track)
What You’ll Take Home (So You Actually Get Value)
You bring home a leather accessory you made during the workshop. The project is one of four:
- glasses case
- jewelry tray
- cardholder
- wallet
This matters for your planning. A handmade leather item becomes part of your daily life—or it becomes a gift you can give with confidence. The class is built around that payoff: you practice, assemble, finish, engrave, and leave with something finished enough to use.
And because the leather is vegetable-tanned and dye is an option, your piece can look like classic leather or more personalized color—depending on what you choose.
The Teaching Style That Makes Beginners Feel Safe
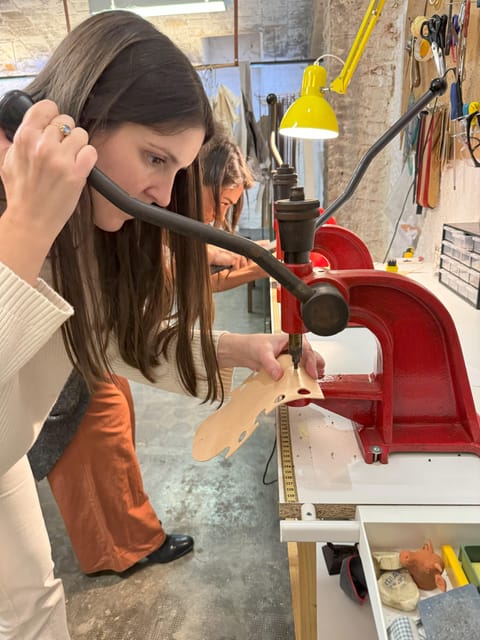
One theme shows up clearly: the instructor is described as kind, patient, and especially good at clear explanations. People also noted that guidance happens at an eye-level approach, which helps you focus on what to do next instead of translating jargon in your head.
That teaching approach is worth taking seriously. Leatherworking punishes guesswork—edges, alignment, and assembly matter. When instruction is slow enough for you to keep up, you’re much more likely to leave satisfied with your result.
Also, the hosts are described as cooperative and understanding when timing gets messy. That’s good to know if your Barcelona day has traffic, museum lines, or trains that run late. A workshop like this works best when the team can keep things calm if the outside world delays you.
Small Group Size: Why Limit 10 Helps
A 10-person maximum is a big quality marker. It usually means:
- instructors can check your cutting and alignment
- questions don’t get lost
- you can adjust your pace without feeling rushed
In a craft workshop, that personal attention is not a luxury—it directly affects the final look of your edges and the accuracy of assembly.
Quick Practical Tips Before You Reserve
- Choose the accessory you’ll use most often, not the one that sounds cool in theory.
- Think about initials in advance so the final step feels smooth.
- If you want dye, decide quickly and be ready to commit to a color direction during the class.
- Wear comfortable clothes you don’t mind getting a little leather dust on.
And if you’re traveling, plan for the workshop as a focused block. This is hands-on and you’ll get better results when you don’t have to sprint across town immediately afterward.
Should You Book This Leather Accessory Workshop?
I’d book it if you want a satisfying, beginner-friendly experience where you finish with something you can carry—glasses case, cardholder, jewelry tray, or wallet. The value is strong because the class includes the leather, the pattern, the finishing findings, and initials engraving, all in a small group format with tool instruction that actually makes sense.
Skip it only if you want a long, open-ended craft journey or you’re expecting fully custom, no-pattern design time. For most people visiting Catalonia, this is a smart use of a couple hours: structured, practical, and grounded in real leather skills rather than a quick show-and-tell.
FAQ
Where does the workshop meet?
The meeting point is at the store See you Leather.
How long is the leather goods workshop?
The workshop duration is 2 hours.
What does it cost?
The price is $82 per person.
How big is the group?
It’s a small group limited to 10 participants.
What languages are used by the instructor?
The instructor speaks Spanish and English.
What leather accessory projects can I choose?
You can choose one of four models: glasses case, jewelry tray, cardholder, or wallet.
Is the leather and pattern included?
Yes. You get a piece of natural vegetable-tanned leather and a pattern, plus the necessary findings for finishing.
Can I dye the leather in the workshop?
Yes, there is an option to dye the vegetable-tanned leather during the workshop.
Is initials engraving included?
Yes, initials engraving is included with the reservation.
Is there free cancellation?
There is free cancellation up to 24 hours in advance for a full refund.